
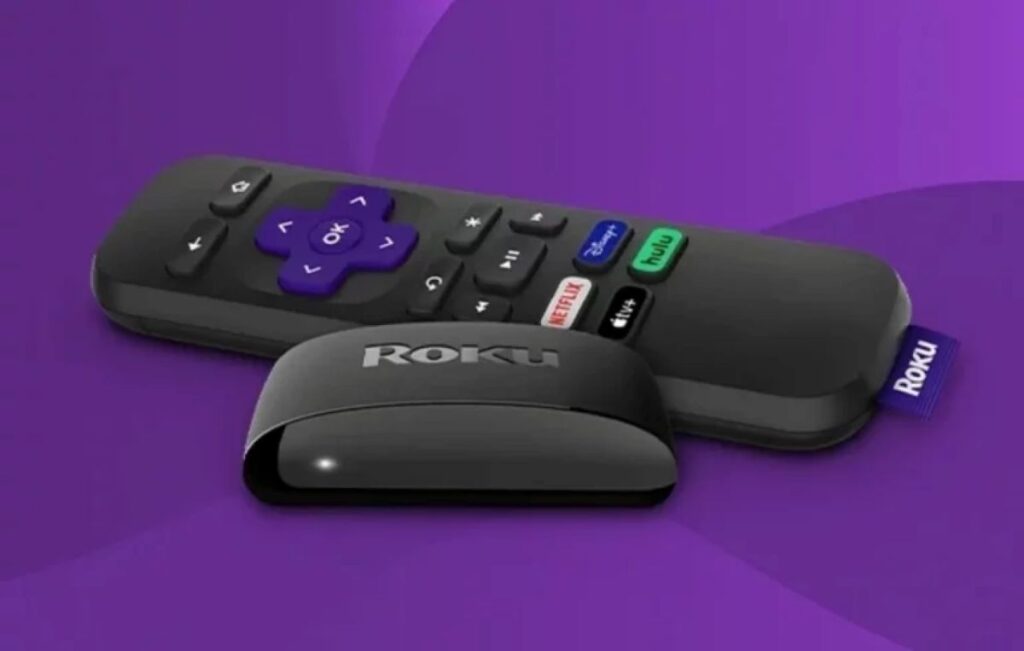

Nothing’s more frustrating than a Roku remote that suddenly stops working—especially when there’s no pairing button in sight. The good news? Your remote probably isn’t broken. With a quick battery reset and the right button combo, you can usually reconnect it in just a few minutes.
Different Types of Roku Remotes
One of the most confusing things about Roku remotes is that not all of them work the same way. You’d think a remote is just a remote, right? But Roku actually has a few different types, and knowing which one you have can save you a lot of frustration.
The most basic type is the standard IR remote. IR stands for infrared, which means the remote works a little like an old TV remote. It has to point directly at the Roku device or TV to work properly. These remotes usually don’t need pairing at all because they communicate using a direct signal instead of Bluetooth or Wi-Fi.
Then there are the enhanced Roku voice remotes. These are the ones that often include features like voice commands, private listening, or TV power and volume buttons. Instead of using infrared alone, they connect wirelessly to your Roku device. That’s why these remotes sometimes need to be paired before they’ll work correctly.
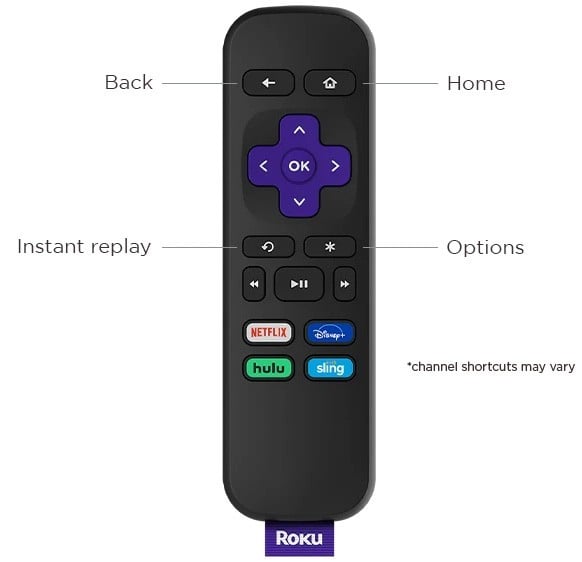
What trips many people up is that some newer Roku remotes don’t even include a visible pairing button anymore. Instead, Roku uses a button combination method to activate pairing mode. Usually, holding the Home and Back buttons together does the trick.
How to Tell Which Remote You Have
If you’re not sure what kind of Roku remote you own, don’t worry — most people can’t tell at first glance either. There are actually a few simple clues that make it easier to figure out.
A Bluetooth or Wi-Fi Roku remote usually has extra features like voice control, headphone listening, or TV volume buttons. These remotes don’t need to point directly at the TV because they communicate wirelessly. So if your remote still works when it’s under a blanket or pointed the wrong way, chances are it’s a wireless Roku remote.
An infrared remote is a little more old-school. It typically only works when pointed directly at the Roku device or TV. If you notice the remote stops responding whenever something blocks the signal, that’s usually a sign you have an IR remote instead.
Here’s the important part: infrared remotes generally do not need pairing. They work automatically as long as the batteries are good and the Roku device can “see” the signal. Wireless remotes, on the other hand, sometimes lose connection after a battery change, software update, or power outage. That’s when pairing becomes necessary.
Before You Start: Quick Things to Check
Before you start pressing buttons and wondering if your Roku remote has officially given up on life, it’s worth checking a few simple things first. I know it sounds almost too easy, but a lot of Roku remote problems come down to batteries, distance, or the remote just needing a quick reset.
Think of this part like the “turn it off and back on again” step. It may not feel exciting, but it solves more problems than you’d expect.
Check the Batteries
First, flip the remote over and remove the battery cover. If your remote has been acting weird, slow, or completely unresponsive, the batteries are the easiest place to start.
Sometimes the batteries aren’t totally dead yet, but they’re weak enough that the remote can’t properly reconnect to your Roku. That’s why it’s a good idea to put in a fresh pair, even if you’re not completely sure the old ones are the problem.
Also, take a quick look inside the battery compartment. Make sure the batteries are facing the right direction, and check that there’s no corrosion or loose contact. It only takes a few seconds, but it can save you from doing a bunch of unnecessary troubleshooting.
Restart the Remote
Next, try giving the remote a simple reset. Remove the batteries and leave them out for about 5 to 10 seconds. Then put them back in.
This helps the remote refresh itself before you try pairing it again. It’s one of those tiny steps that seems too basic, but it can make a real difference when the remote is stuck or not responding properly.
Once the batteries are back in, don’t rush too much. Give the remote a moment, then try the pairing steps again. Sometimes the remote just needs that little reset before it’s ready to connect.
Stay Close to the Roku Device
When you’re trying to pair the remote, stay close to your Roku TV or Roku streaming device. Don’t stand across the room and hope for the best.
Pairing works better when the remote is nearby because it gives the Roku device a stronger chance of detecting it. Hold the remote close to the TV or streaming stick while you’re putting it into pairing mode.
This is especially helpful if the remote didn’t connect the first time. Move closer, try again, and give it a few seconds. A lot of the time, that small change is enough to get the connection message to appear on the screen.
Step-by-Step: How to Pair a Roku Remote Without a Pairing Button
Now that you’ve checked the batteries and made sure you’re close to the Roku device, it’s time to actually pair the remote. Don’t worry, this isn’t as complicated as it sounds.
The confusing part is that some Roku remotes don’t have that little pairing button hidden under the battery cover. So if you opened the back of the remote and thought, “Wait… where is it?” you’re not alone. Some Roku remotes use a button combination instead, and once you know which buttons to press, the whole thing feels much easier.
Step 1: Remove and Reinsert Batteries
Start by flipping the remote over and taking off the battery cover. This is usually the easiest place to begin because the remote may just need a quick refresh before it can connect again.
Take the batteries out and leave them out for about 5 to 10 seconds. You don’t need to do anything fancy here. Just give the remote a moment to reset itself. Then place the batteries back in, making sure the positive and negative ends are lined up correctly.
This is also a good time to ask yourself when you last changed those batteries. If you honestly can’t remember, it’s probably worth putting in a fresh pair. Weak batteries can make the remote act like it’s broken, even when the real problem is just low power. The video guide also recommends removing the batteries briefly and replacing them with a fresh pair if needed.
Once the batteries are back in, put the cover back on or leave it off for a moment while you test the remote. Either way is fine. The main goal is to get the remote powered up again before moving to the next step.
Step 2: Put the Remote Into Pairing Mode
Now you’re going to put the remote into pairing mode. Since there’s no pairing button, you’ll use the Home button and the Back button instead.
Press and hold both buttons at the same time. You’ll want to keep holding them until you see a green light flashing on the remote. That flashing light is the sign that the remote is trying to pair with your Roku device.
This is the part where people sometimes let go too early. If nothing happens after a second or two, don’t panic. Keep holding the buttons a little longer and watch for that green flashing light. It may take a few moments before the remote enters pairing mode.
Once the light starts flashing, your remote is basically saying, “Okay, I’m ready to connect.” Now your Roku TV or streaming device needs to recognize it.
Step 3: Watch for the Connection Message
After the green light starts flashing, look at your TV screen. You may see a message pop up saying the remote is connecting or pairing. That’s a good sign.
Give it a few seconds. Sometimes it connects pretty quickly, and other times it takes a little longer. Try not to press a bunch of random buttons while it’s working. Just let the Roku device and the remote do their thing.
The video notes that a connection message may appear on the screen once the remote starts pairing, but it may not happen every single time on the first try.
If nothing shows up, don’t assume you did something wrong. Roku remotes can be a little stubborn sometimes. You may simply need to repeat the Home and Back button step one more time.
Step 4: Move Closer to the Roku Device
If your remote still isn’t connecting, move closer to the Roku TV or Roku streaming device. This sounds almost too simple, but it really can help.
Hold the remote near the Roku device while it’s in pairing mode. If you have a Roku streaming stick, get the remote close to the stick. If you have a Roku TV, stand near the TV itself.
Sometimes the remote just needs to be close enough for the Roku to detect it clearly. This is especially true if there’s interference, weak batteries, or the remote is having trouble reconnecting.
Once you’re closer, press and hold the Home and Back buttons again until the green light flashes. Then watch the screen for the connection message. In many cases, this second attempt is what finally gets everything paired and working again.
Read Also: Your Roku has 11 hidden settings and menu screens. Here’s how to unlock them all