

Let me guess… your iPhone buttons aren’t as cooperative as they used to be. Maybe you have to press a little harder than before, or maybe one of them just gave up completely. It’s frustrating—especially when you’re trying to take a quick screenshot and end up locking your screen instead. You’re not alone in this. A lot of people run into this exact issue over time.
The good news? You don’t have to keep fighting with those buttons. There are actually a few simple ways to take a screenshot without pressing anything on the side of your phone. And once you try them, you might even prefer them over the “old way.”
This is especially helpful if your buttons are worn out, your hands aren’t as steady, or you just want something easier and more comfortable. Think of it as one of those little iPhone tricks that makes everyday life just a bit smoother.
1. Use AssistiveTouch (The Easiest Method)
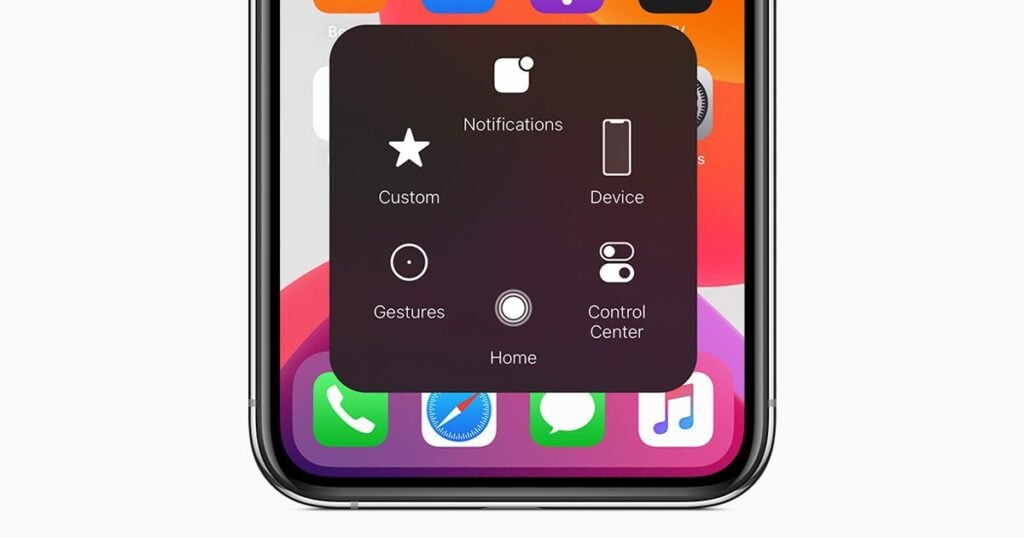
If you’ve never used AssistiveTouch before, you’re going to love this. It’s basically a small floating button that sits on your screen and gives you quick access to important actions—like taking a screenshot—without needing any physical buttons at all.
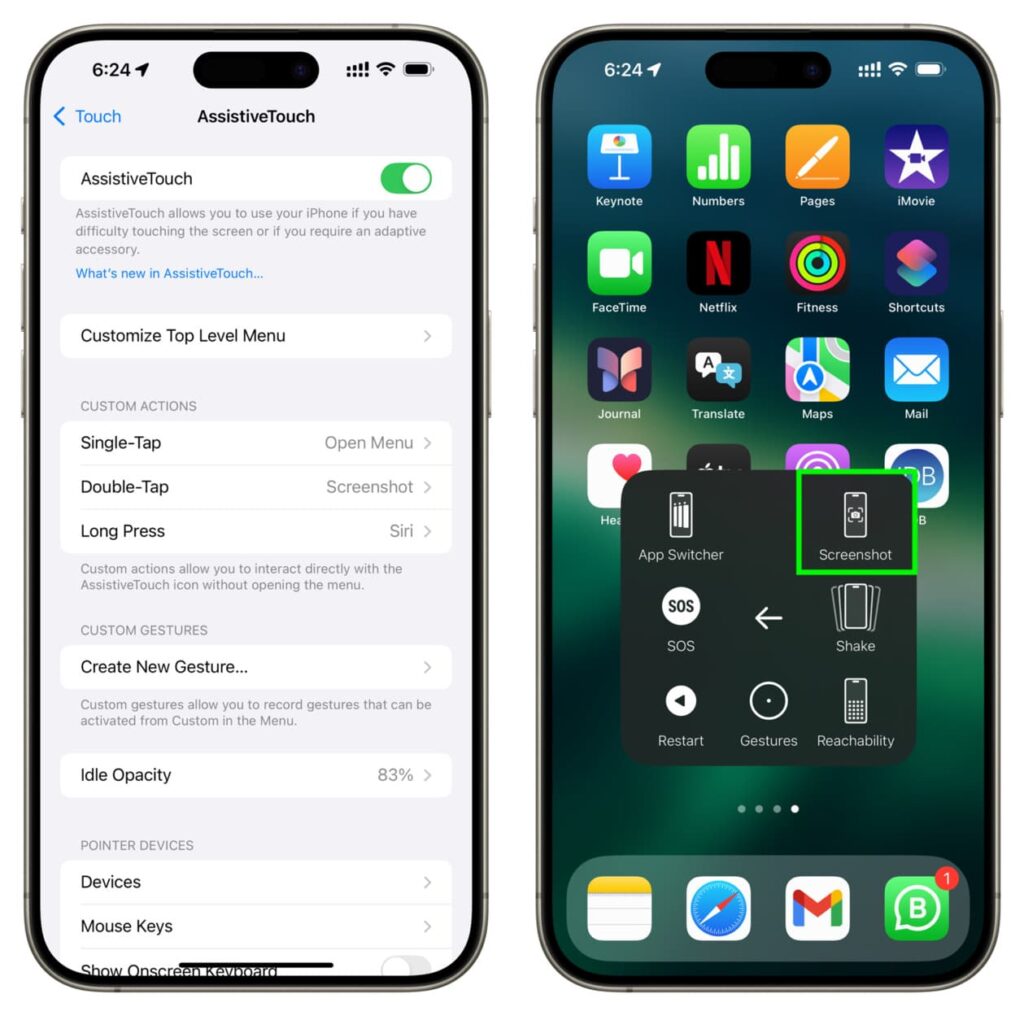
Setting it up only takes a minute. Just go to Settings → Accessibility → Touch → AssistiveTouch, and turn it on. You’ll see a little circle appear on your screen. Tap it, then go to Device → More → Screenshot, and just like that—you’ve taken a screenshot without pressing a single button.
What’s really nice about this is how reliable it feels. No awkward hand positions, no pressing two buttons at once and hoping it works. It’s especially helpful if your phone is in a case or if your buttons are getting worn out.
And here’s a little tip that makes it even better: you can customize that menu so “Screenshot” is right on the main screen. That way, it becomes a simple one-tap action. Once you get used to it, it feels surprisingly natural—like you’ve unlocked a hidden shortcut your phone had all along.
2. Use Back Tap (Double or Triple Tap the Back)
Okay, this one feels a little like a hidden trick Apple didn’t make a big deal about—but once you discover it, it’s hard to go back. Back Tap lets you take a screenshot just by tapping the back of your iPhone. No buttons, no menus… just a quick tap-tap and you’re done.
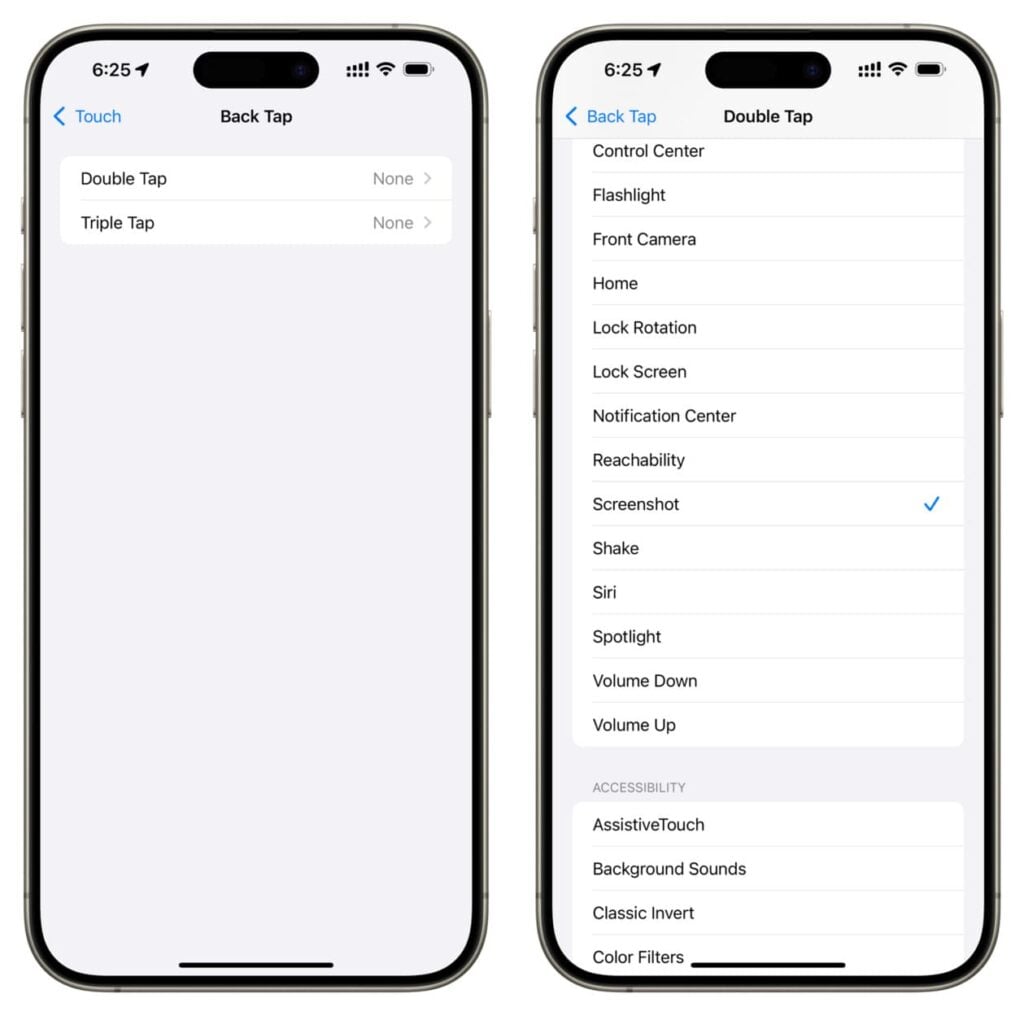
Setting it up is simple. Go to Settings → Accessibility → Touch → Back Tap, then choose either Double Tap or Triple Tap. From there, select Screenshot. That’s it. Now anytime you tap the back of your phone, it’ll snap a screenshot like magic.
What people love about this is how natural it feels. You don’t have to reposition your hand or think about which buttons to press together. You’re just holding your phone like normal, give it a quick tap, and it works. It’s especially nice if your hands are full, or if pressing buttons feels awkward or uncomfortable.
One small thing to keep in mind—this works best on newer iPhones and can be a little sensitive. Sometimes it might trigger accidentally if you tap too hard or set your phone down quickly. If that happens, just switch from double tap to triple tap for a bit more control. Once you get the feel for it, though, it’s one of those little features that makes your phone feel smarter—and your life a bit easier.
Read Also: 8 Types of Apps You Should Never Install on Your iPhone
3. Use Siri to Take a Screenshot
Now this one feels almost too easy—and that’s exactly why people love it. If you already use Siri from time to time, you can simply say, “Hey Siri, take a screenshot,” and your iPhone will do it for you. No buttons, no tapping, nothing. Just your voice.
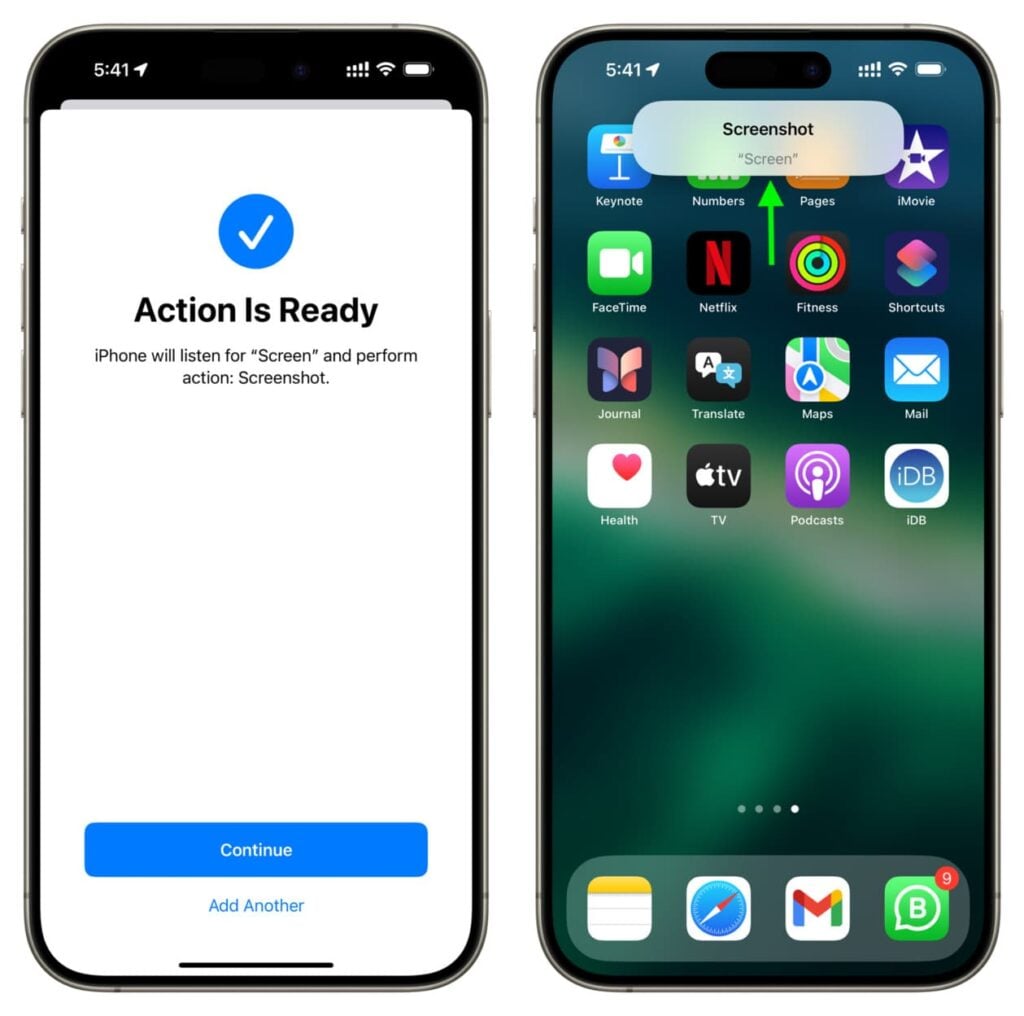
This is especially helpful in those real-life moments where your hands aren’t free. Maybe you’re holding a cup of coffee, carrying groceries, or just don’t feel like fumbling with your phone. You just say the words, and it’s done. It’s also a great option if pressing buttons feels uncomfortable or if you’re trying to avoid using them altogether.
That said, it’s not perfect in every situation. Siri might struggle in noisy environments, or there may be certain apps where it doesn’t respond as smoothly. But for everyday use—like saving a message, a recipe, or something your grandchild sent you—it works beautifully.
Think of it as your little hands-free helper. Once you get used to asking Siri for simple things like this, you’ll start to realize just how much easier your phone can make your day.
4. Use External Tools (Mac or Other Devices)
Alright, this one might sound a little more “techy” at first—but stay with me, because it’s actually pretty straightforward once you try it. If you have a Mac (like a MacBook or iMac), you can connect your iPhone to it and take screenshots right from your computer. No buttons on your phone needed at all.
Here’s the simple idea: you plug your iPhone into your Mac using a cable, open QuickTime Player, and choose New Movie Recording. Then, you select your iPhone as the camera source. Suddenly, your phone’s screen shows up right on your computer. From there, you can take a screenshot on your Mac like you normally would.
This is especially helpful if you’re trying to capture a lot of screenshots in a row, or if you want a bigger, clearer view of what you’re doing. It’s great for saving recipes, writing tutorials, or even helping someone else step-by-step without squinting at your phone.
Now, I’ll be honest—this isn’t something you’ll use every single day. But when you need it, it’s incredibly useful. Think of it like your “backup plan” when you want more control, a bigger screen, or just a break from fiddling with your phone altogether.
Final Thoughts
At the end of the day, you really don’t have to rely on those side buttons anymore—and that alone can feel like a small relief. Whether your buttons are worn out, a little stubborn, or you just don’t enjoy pressing them, there are easier ways to get the job done without the frustration.
If you’re not sure where to start, I’d gently suggest trying AssistiveTouch or Back Tap first. They’re simple to set up, and once you use them a couple of times, they start to feel second nature. It’s one of those “why didn’t I do this sooner?” kind of things.
And honestly, that’s what little tech tricks like this are all about. They’re not life-changing in a big dramatic way—but they quietly make your day smoother, easier, and just a bit more comfortable. And sometimes, that’s exactly what we need.
Read Also: 2 Simple Tricks to Reclaim Your iPhone Storage Without Deleting a Single Photo